Mk II Viper munitions
“Whaddya hear? Nothin’ but the rain!”
The closest ammunition I could find to what seems to be agreed as the right one for the Viper, is a NATO 30mm cannon round with a 173mm long case.
I used a scrap pieces of wood and turned them on my lathe. Metalwork lathes work OK on wood, lucky for me. I used a photograph of the NATO round and was able to guesstimate approximate dimensions, knowing the diameter of the projectile was 30mm. It looks good after a bit of paint. I masked it off and sprayed the bands on it. I’ve since acquired a .PDF data sheet on them with the exact specs. My first one wasn’t far off, but the rest are now on point.
Here are some screen references and a diagram to work from.
Painted round was machined using a photograph of a live round next to a ruler. The unpainted round next to it was machined using the exact specs from a military .PDF data sheet. There are some subtle differences due to distortion in the photograph, but for display purposes they are acceptable.
Chain link.
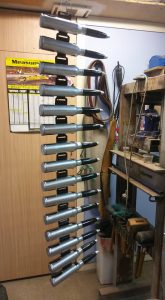
To link them all together I am making the steel links that hold each round then join them together to feed into the cannon from the magazine storage in the wings. I made a template out of card then traced onto sheet metal to be cut out with aviation shears.
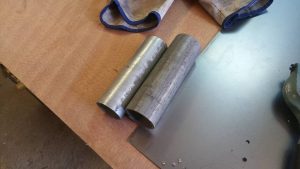
Next I made a shaping press out of 42mm outside diameter pipe and 42mm inside diameter pipe, cutting the outside pipe lengthwise in half and cut some slots in the sides of it to allow for the link loop and hook.
Next, I put the flat cut out in between the pipes and pressed together with the vice.
With a little more tuning on the pipe with a planishing hammer, let’s call it, “persuasion”, I got it into a snug fit.
My shaping press worked for a few, but then it started distorting and I was constantly having to bash it back into shape. So, I went back to the drawing board and strengthened it with plate steel and welded another pipe inside the 40mm pipe to stop it from squashing. The results are much more consistent.
I decided to make the colours BSG accurate instead of real world accurate.
I wanted to at least make some attempt to make the back end of the rounds look like they have primers in them, so I used a 20mm spade bit to drill a hole and countersunk ring, then bashed in clout nails to be ground and polished later.
I also changed from rubbish pine to a hardwood made from half a dozen old rotten tree stakes. After sorting through them and cutting off the rotten half, I salvaged enough from the rubbish pile to turn a few more bullets. They turn much nicer.


